Homemade Gyoza Wrappers in a Bread Machine
Translated from my original Japanese post (2019). 日本語の原文を読む →
Hi, it's Yoko.
This is out of the blue, but do you like gyoza?

I love gyoza!
Little bite-sized gyoza you can pop in your mouth one after another
Crispy fried gyoza
Chewy gyoza eaten with chili oil with crunchy bits, truffle gyoza...
I've eaten all kinds of creative gyoza at restaurants and gyoza festivals.
Gyoza is practically Japan's national food, and I think almost everyone loves it.
What if you could freely make gyoza just the way you like it, crispy or chewy?
Home cooking would get so much more fun!
This time I've put together tips for easily making gyoza in all sorts of textures.
Homemade gyoza is by far the best!
The gyoza I like have slightly thick, chewy wrappers,
fried crisp in plenty of oil and full of juice.
Store-bought gyoza is sometimes bulked up with textured vegetable protein,
and restaurant gyoza can have thin wrappers or be greasy...
It's surprisingly hard to find gyoza that's just to your taste, isn't it?
But if you make gyoza yourself, the filling, the thickness of the wrapper, how well it's cooked
are all exactly how you want them.
It takes a little practice, but once you get the hang of it you can crank out amazing gyoza by the dozen
and eat them whenever you like.
Handmade wrappers are overwhelmingly chewy
The first thing you need is the gyoza wrapper.
I recommend making the wrappers by hand too! Handmade wrappers have a completely different chewiness.
The downside is that they take a bit of work.
If you're making gyoza for the first time, or you're not particular about the wrappers,
it's better not to push yourself and just buy store-bought wrappers.
If you're not used to it, large wrappers are easier to fold, and there are also chewy ones made with rice flour.
But if you think, "I don't mind a bit of effort, I want to make my own wrappers!"
a bread machine is handy when you don't feel like kneading.
You can use the bread dough mode, and most machines probably also have an "udon/noodle" mode.
Kneading for about 15 minutes in this mode is enough.
After kneading, let the dough rest in the fridge for a day. The moisture spreads fully through the dough and the chewiness goes up.
Crispy and chewy homemade jumbo gyoza
Once you've decided on the wrappers, gather the other ingredients.
This time we're making jumbo gyoza that are crisp when pan-fried, chewy in the wrapper, and full of juice.
Here are the ingredients.
Control the texture of the wrapper with water and boiling water
This amount makes about 25 wrappers (quite thick) or 50 (regular).
- Cake flour: 200 g
- Bread flour: 200 g
- Boiling water: 200 g
- Salt: a pinch
The key is the liquid.
Whether you use boiling water or cold water changes the texture of the finished wrapper.
First, kneading with cold water.
When the protein in wheat flour combines with water, it forms gluten (strong stickiness and chew).
So cold-water dough is suited to boiled gyoza (suigyoza).
Next, using boiling water instead of cold water.
With boiling water, the gluten sets.
But the starch gelatinizes.
(It's the same principle as cooking rice, or thickening a dish with potato starch.)
When starch gelatinizes it becomes sticky, but it isn't as springy and chewy as gluten,
so boiling water suits pan-fried gyoza.
Also, bread flour has the most protein, then all-purpose flour, then cake flour, so
bread flour and cold water gives a chewy texture, while cake flour and boiling water gives a lighter, crumbly texture.
Here the blend acts like all-purpose flour with boiling water, which gives a moderate chewiness,
but it's fun to play with the flour ratios and with cold versus boiling water to suit your taste.
A filling that gets juicy thanks to gelatin!
Makes about 50
The filling goes like this.
- Ground pork: 500 g
- Cabbage: 5 leaves (minced)
- Garlic chives: 1/2 bunch (minced)
- Ginger: 1 knob (minced)
- Garlic: 1 clove (minced)
- Sesame oil: 2 tbsp
- Soy sauce: 2 tbsp
- Shaoxing wine or sake: 2 tbsp
- Powdered gelatin: 10 g
- Salt: 1 tsp
- Pepper: as needed
Cabbage: napa cabbage or a mix is fine if you prefer.
Garlic chives and garlic: they boost the umami. Leave them out if the smell bothers you.
The biggest secret of the filling is powdered gelatin.
Adding powdered gelatin makes the gyoza juicy and full of meat juices,
and also helps the meat bind together (it's used in sausages too).
How to make them
First, the wrappers.
For the wrappers, mix all the ingredients together.
If you're using boiling water, start by mixing with chopsticks, then put it in a plastic bag or similar and knead until it comes together.
If you have a bread machine, you don't have to knead by hand, so it's easy.

Let the kneaded dough rest at room temperature for 1 hour to 1 day.

While the dough rests, make the filling too.
Keep adding the ingredients to the ground meat.

If you want juicy gyoza overflowing with meat juices, gelatin is definitely the way to go.
Add plenty of vegetables, too.

Once the filling is done, take out the dough that has been resting in the fridge.
This is dough that sat overnight.

With time, the moisture in the dough evens out and it gets chewier.
It feels nice and moist when you touch it.
Roll this out into a cylinder about 3 cm in diameter and 30 cm long.
Straight from the fridge it's stiff. Leave it at room temperature for about 30 minutes and it's easier to handle.
It's a bit firm, but hang in there!

If it's sticky, dust it with flour.
Then use a bench scraper to cut it into 2 cm pieces.
(Cut them in half if you prefer thin wrappers.)

As you cut, roll the cylinder 90 degrees at a time to change its orientation and you'll get even pieces.
From here, just roll each piece out into a circle and you're done.
But if the size is off, it ends up disappointing.
The usual size is 8 to 11 cm across and 1 to 2 mm thick, so make one first as a test.
Lightly reshape the piece into a round cylinder,

and flatten it with your palm.

Lightly flour your rolling pin, and turn the dough with one hand while rolling the pin with the other to stretch it into a circle.

A short rolling pin is easier to handle, by the way.
As each wrapper is finished, dust it with flour so they don't stick, and stack them slightly offset. (Cover with plastic wrap so they don't dry out.)

When all the wrappers are done, wrap the filling.
Dab a fingertip in water and moisten half the edge of the wrapper, then place the filling.
Here's what it looks like with the 3 cm cylinder cut into 2 cm pieces.

And with the pieces cut in half.

Fold in pleats as you wrap, and seal the edge firmly.

The dough stretches better than store-bought wrappers, so it's easy to wrap.
Line up the finished ones on a tray dusted with flour.

If you have filling left over, use it in fried rice or the like.
Pan-fry gyoza to pro-level crispness in an iron skillet!
Now, finally, let's cook the gyoza.
An iron skillet helps prevent the common pan-fried gyoza failures!
It keeps you from adding too much water and ending up with soggy wrappers, or from the gyoza sticking to the pan and falling apart.
You can of course use a nonstick pan, but an iron pan cooks at a higher heat so the crispness is on another level,
and you get pro-level results, so I'm using an iron skillet this time.
First, heat the pan until it's smoking hot.

Add 2 tbsp of sesame oil, lower the heat to medium-low, and quickly set the gyoza in the pan.
At this stage, brown about 80% of the wrapper.

Strangely, if you brown them first, they stop sticking to the pan.
Lift one to check the color.

When they're a light golden brown, add water and cover right away.
Too much water makes them soggy, and too little means the filling won't cook through, so be careful.
As a guide, add water up to about 1/4 of the height of the gyoza. This time I used 100 ml.

Keep the lid on and steam for 4 to 6 minutes.
The wrappers turn translucent and the droplets on the lid grow bigger.

When you hear a sizzling sound, take off the lid and cook off the remaining water.

Drizzle in a little sesame oil from the edge of the pan, and when they're browned to your liking, take them out. If you shake the pan, they should slide right off.
Thick wrappers are sturdy, so you can brown the sides too (lol)

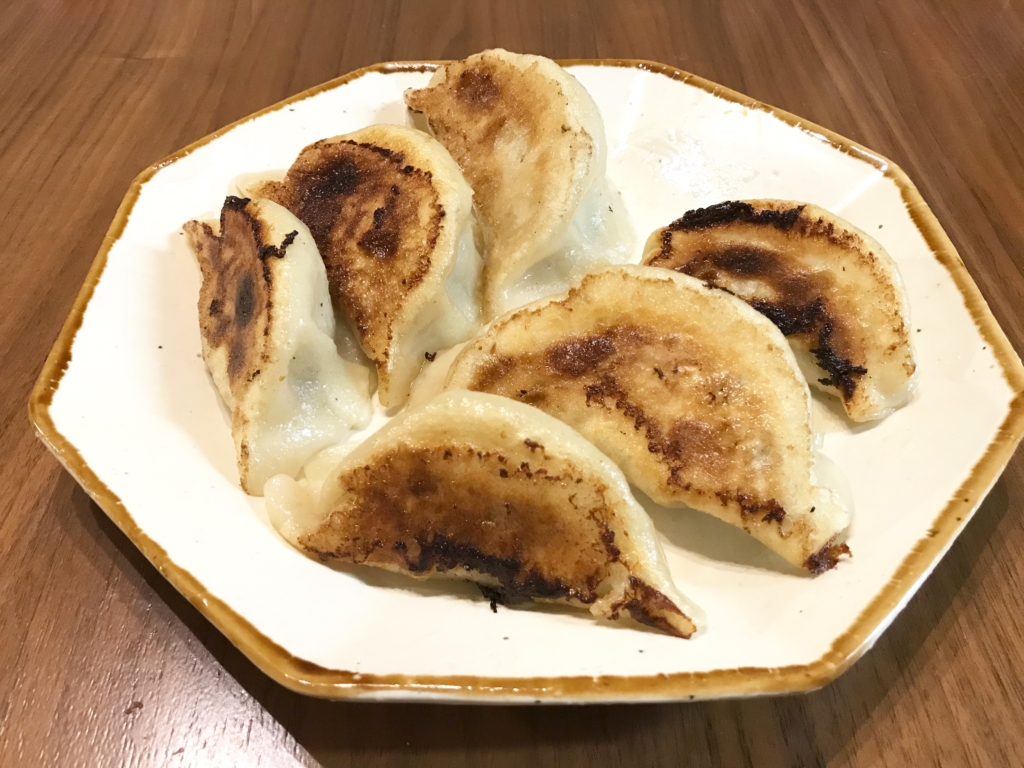
Here's how they turned out.
I like to eat them light, with vinegar and white pepper.

Mmm! Crisp outside yet chewy, and the juices come pouring out from inside!

For boiled gyoza, just boil the wrapped gyoza in hot water and they're done when they float.
What do you think?
Both pan-fried and boiled gyoza look easy once you get the knack, don't they?
Just get the points about water, flour, and the pan right, and you can freely make crispy thin-skinned gyoza or chewy jumbo gyoza.
The time you put in makes them taste even better, so please give them a try.
See you next time. Au revoir!